Bootstrap Checkbox Input
Intro
In some cases the elementary things might become extremely required-- especially once you come to need them. As an example exactly how do your site visitors interact with the pages you set up specifying a simple Boolean act-- simply just yes or no pertaining to a couple of the thoughts you need to ask, exactly how they do agree to the conditions and terms or else line up a handful of the attainable preferences they might have. We commonly get past this without paying a lot of an interest to the element chargeable for these sorts of actions but the Bootstrap Checkbox Label is really a quite significant feature-- one our forms can not in fact complete without.
In the current fourth edition of the Bootstrap platform we are presented with the
.form-check.form-check-label<div>.form-check.form-check-label<label><input>.form-check-inputExactly how to utilize the Bootstrap checkbox:
The checked condition for all these buttons is only improved via click event on the button. If you work with one more option to update the input-- e.g., with
<input type="reset">.active<label>
<div class="btn-group" data-toggle="buttons">
  <label class="btn btn-primary active">
    <input type="checkbox" checked autocomplete="off"> Checkbox 1 (pre-checked)
  </label>
  <label class="btn btn-primary">
    <input type="checkbox" autocomplete="off"> Checkbox 2
  </label>
  <label class="btn btn-primary">
    <input type="checkbox" autocomplete="off"> Checkbox 3
  </label>
</div>
From time to time we really need the checkboxes to arrive inside our forms without the user really can make any sort of activity clicking on them-- that is definitely where the disabled option shows up.
To disable appropriately a checkbox in Bootstrap 4 utilizing the standard HTML attribute
disabledIn case that you really like the concept and indeed desire to handle this you must assign the
.disabled.form-checkOne more good example
Whenever applying checkboxes, wrap them in a
<label>.custom-control.custom-checkboxEmploy
.custom-control-input<input>As well utilize two
<span>.custom-control-indicator.custom-control-description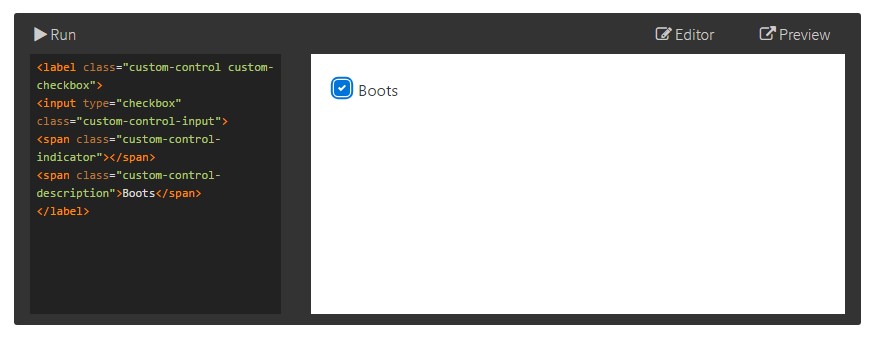
<label class="custom-control custom-checkbox">
<input type="checkbox" class="custom-control-input">
<span class="custom-control-indicator"></span>
<span class="custom-control-description">Boots</span>
</label>
Bootstrap Checkbox Style forms
Default checkboxes and radios are upgraded upon with the aid of
.form-checkDisabled checkboxes and radios are supported, but to give a
not-allowed<label>.disabled.form-checkA new stuff for the Bootstrap version 4 framework is the launch of the so called custom form features. These are actually the identical components we are known within performance but designated far more interesting and also in the Bootstrap way. Utilizing them you can absolutely add in special taste and personality to your web content through just appointing a couple of special classes to the commands you involve in your forms.
In order to work with customized checkboxes wrap them inside a
<label>.custom-control.custom-checkbox<input>.custom-control-input<span>.custom-control-indicator.custom-control-descriptionConclusions
That's practically all that you should do in order to put a checkbox element in your Bootstrap 4 powered web pages and add in some customized flavor to it incorporating it a fancy looks. Currently all you ought to do is repeat the practice unless you have actually inspected all of the checkboxes wanted are readily on the page.
Look at a couple of on-line video information regarding Bootstrap checkbox
Related topics:
Bootstrap checkbox authoritative documents

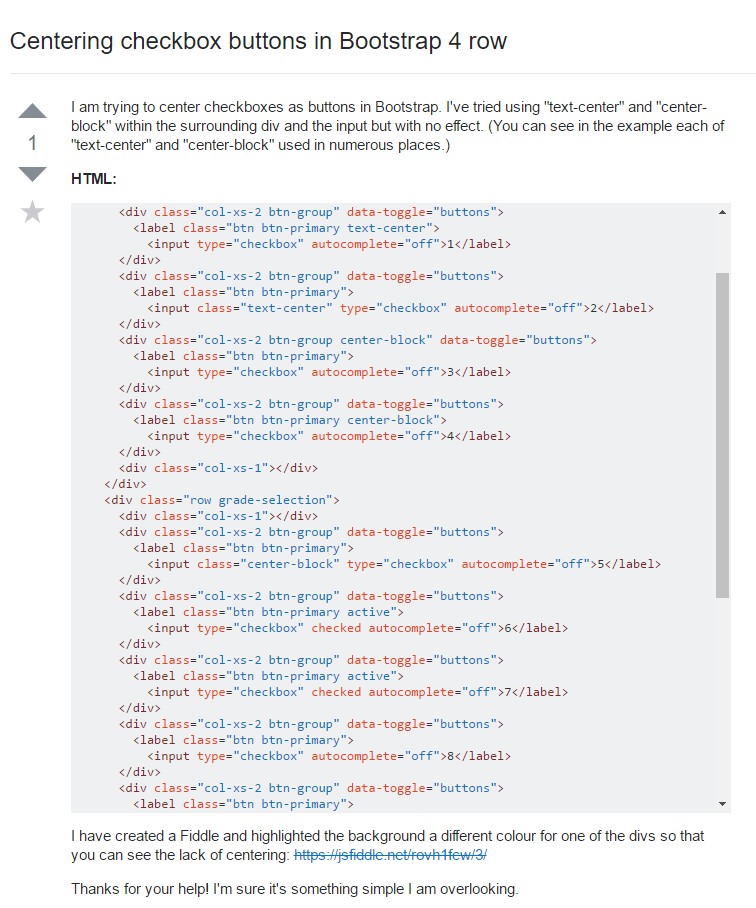
Centering checkbox buttons in Bootstrap 4 row
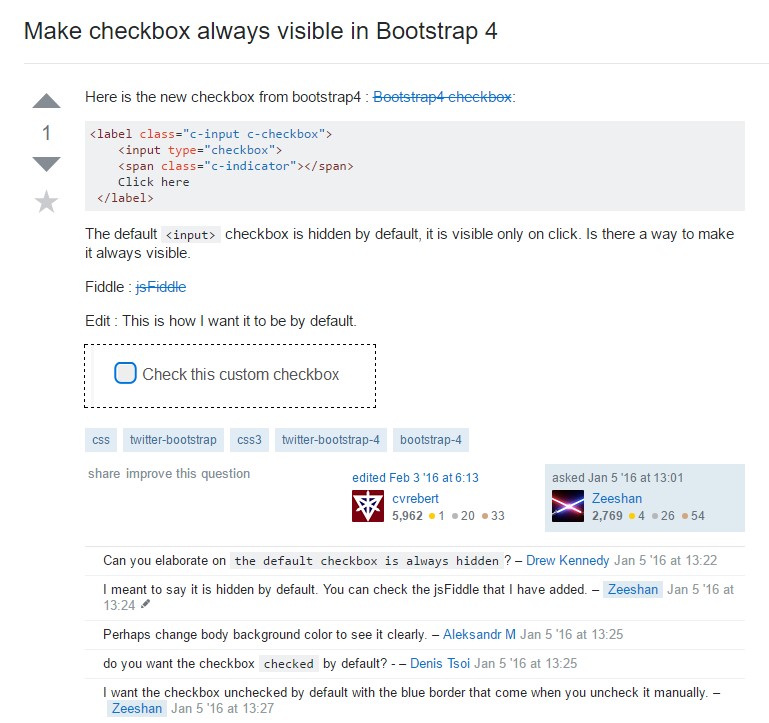
Make checkbox always visible in Bootstrap 4